Home  |  Contact  

Email:

Password:

Sign Up Now!

Forgot your password?

FANTASIA ANIMADA
 
What’s New
  Join Now
  Message Board 
  Image Gallery 
 Files and Documents 
 Polls and Test 
  Member List
 ♥Adopciones♥ 
 ♥Animaciones♥ 
 ♥Explicaciones♥ 
 ♥Fondos♥ 
 ♥Fondos Arreglos♥ 
 ♥General♥ 
 ♥Grupos Amig@s♥ 
 ♥Interesantes♥ 
 ♥Juegos♥ 
 ♥Layouts♥ 
 ♥Mensajitos♥ 
 ♥Musica♥ 
 ♥Ofrecer Firmas♥ 
 ♥Panel Exposicion♥ 
 ♥Practicas Adelaida♥ 
 ♥Practicas Dorys♥ 
 ♥ Pract. Dvaneska♥ 
 ♥ Practicas Norai♥ 
 ♥Practicas Aurora♥ 
 ♥Practicas Margot ♥ 
 ♥Practica Semanal♥ 
 ♥Retirar Firmas♥ 
 ✿ ♥♥♥♥♥♥♥♥♥♥♥♥ ✿ 
 ♥Materiales PSP♥ 
 ♥Panel Tutos PSP♥ 
 ♥Recursos PSP♥ 
 ♥Tutoriales Otros♥ 
 ♥Tutos Mr Blue Sky♥ 
 ♥Tutos PSP I♥ 
 ♥Tutos PSP II♥ 
 ♥Videos♥ 
 ✿ ♥♥♥♥♥♥♥♥♥♥♥♥ ✿ 
 ♥ Salon de Chat ♥ 
 
 
  Tools
 
♥Practicas Margot♥: AUXILIO TUTORIAL BLAST FRAME
Choose another message board
Previous subject  Next subject
Reply  Message 1 of 6 on the subject 
From: Margot Salazar  (Original message) Sent: 24/03/2025 16:38
Mi dulce Arisami:
 
Estoy haciendo este tutorial:
 http://pannsplace.50megs.com/tutorials/blastframe/blastframe.html
 
Cuando llegó aquí..
Take the magic wand and click in the white border area to have it selected and see "the marching ants". Go to Blade Pro and apply the "copper shimmer".
 
... en mi Super Blade Pro no me aparece ese "cooper shimmer" que sospecho es un preset.
 
En Google escribí "presets super blade pro" pero no aparece ese.


First  Previous  2 to 6 of 6  Next   Last  
Reply  Message 2 of 6 on the subject 
From: ♥Arisami♥ Sent: 24/03/2025 18:03
 
Hola Margot, si, yo tampoco tengo ese preset,
solo me aparecen dos "copper" el frame y el glass,
pero mirando el efecto que tiene, se puede conseguir
con el filtro Noise que trae el Unlimited, solo rellena
la seleccion con este color #95A482 y vas a filtros
Unlimited-Noise Filters-Add Noise (uniform) y la
cantidad de Noise que sea entre 80 y 81.


Reply  Message 3 of 6 on the subject 
From: Margot Salazar Sent: 24/03/2025 21:31
Mi dulce Arisami:
 
Sos tremenda genia.
 
La buena noticia es que seguí tu indicación y lo hice perrrrrrrrrrrrfectamente.  Pero... me he enradado más que un bulto de anzuelos cuando seguí adelante y llegue donde te dejo abajo.  Hice de todo, quedé sudando como si hubiera corrido una maratón.
 
Este es mi enredijo:
 
Because our nice blade pro edging has been altered, we will remove the edge part. Go to "Selections - Select All" Then go to "Selections - modify - contract - contract by 4". Then double click on the crop tool and change the settings to "surround a selection" found near the bottom of the screen. Then you can go to "Image - crop".

Leave this image open, and reopen our original picture that has been sitting at the bottom. Activate the original, then click on "control C" to copy it. Then activate the "blasted image" and press "control L" and your image will be pasted exactly in the centre of the larger copy on a new layer.

Using the magic wand, click outside the area of the pasted image to get the marching ants and then go to "Selection - invert". Apply a drop shadow with these settings
Opacity.....60
Blur.....15
Vertical and Horizontal.....4

Then immediately go back and add another drop shadow but change the vertical and horizontal to -4 (minus 4)

Go to "Layers....merge all"
We will return our nice edging by re-adding a white symmetrical border of 4. Activate it with the magic wand, then reapply the "copper shimmer" blade pro setting. Finish off by choosing "Selections - invert" and then go to effects - cutout - and use the following settings
Opacity.....80
Blur.....30
Horizontal and Vertical.....0

Deselect your image and your framed image should now be finished.


Reply  Message 4 of 6 on the subject 
From: ♥Arisami♥ Sent: 25/03/2025 04:37
 
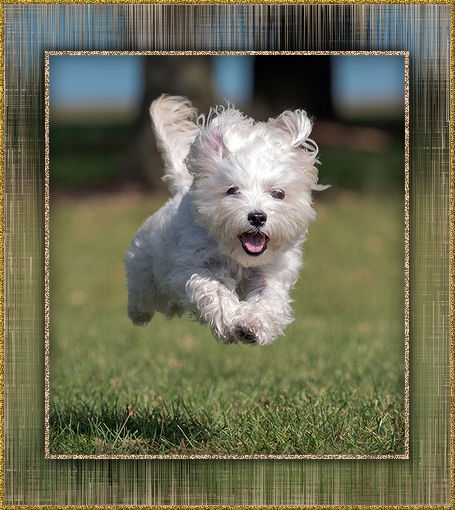
Si Margot, una vez que tienes la copia hecha y has acrecentado el duplicado de tu imagen en un 125%,
le aplicas el efecto Blast del filtro dsb flux, 20 horizontal, 20, vertical, 20 arriba y 20 hacia abajo, entonces,
seleccionas todo - contraer 4, vas a tu herramienta de recorte, das doble click y en la ventana que 
emerge, cambias la opcion a "surround a selection" enseguida das doble click sobre la imagen parail
que se efectue el recorte, enseguida vas a la imagen original, copias y pegas como nueva capa èsta ùltima,
sobre la copia acrecentada, cierra enseguida la primera capa y selecciona con la varita el espacio sobrante
en la segunda capa, vas a selecciones-invertir y aplicas una sombra con estas especificaciones Opacity.....60
Blur.....15, Vertical and Horizontal.....4, para despuès aplicar de nuevo sombra solo que ahora con -4 
tanto en vertical como en horizontal.
finalmente fusionas las capas y agregas otro borde de cuatro solo que te recomiendo que elijas un
color que no tenga la imagen como un rojo o azul fuertes, para que la seleccion no tome parte del
reto de la imagen, rellenas entonces con el color #95A482 y le aplicas el Unlimited-Noise Filter-Add Noise
(Uniform) y la cantidad entre 80 y 81


Reply  Message 5 of 6 on the subject 
From: Margot Salazar Sent: 25/03/2025 18:39
¡Mi dulce Arisami!
 
Lo hice... lo hice... lo hice
 
Me faltaba la magia de tu genialidad.
 
Ahora que lo envíe haré el tutorial en word con tus indicaciones. 
Lo guardaré por si se te ofrece en cualquier momento.
 
¿Cómo agradecerte tanto?


Reply  Message 6 of 6 on the subject 
From: ♥Arisami♥ Sent: 26/03/2025 21:02
 
Que bien Margot, excelente trabajo,
felicitaciones!


First  Previous  2 a 6 de 6  Next   Last  
Previous subject  Next subject
 
©2025 - Gabitos - All rights reserved