Posted on Feb 21st 2010 by hungrypanda.

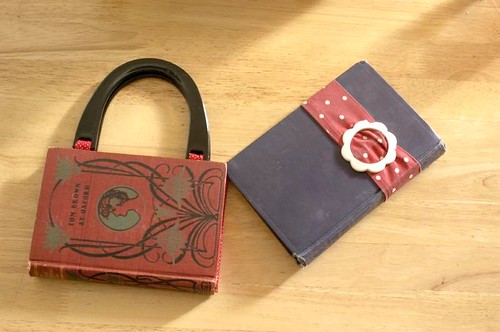
Book Purse/Clutch
A purse for the librarian in you. (Update: If any of you makes a book purse, please send me a pic! I would love to post it.)
1. Find an old hard covered book with an interesting cover.

2. Use a X-acto knife and cut out all the pages of the book. You
should now have just the book cover. I know, I know, this part is PAINFUL… But you can maybe make some pretty book art from it.

3. Cut a piece of fabric the same size as the book cover, fold the
edges in 1/2 inch and iron. Uhhh…. I forgot to take a picture at this step, so here are some cherry blossoms from Tokyo instead.

4. If you are making a clutch, you can skip this step and go onto step 5. If you want a purse, this is the time to dig out your purse handles. You can buy purse handles in a lot of places nowadays. Just google it. These handles I have here, they each have a little slot for attaching it to a purse. Your purse handles could be totally different, so you have to get creative by yourself here. But the basic idea is to use some of your fabric to create straps for attaching your handles to the inside of the book.
Sew the strips with the right sides facing each other, turn them inside out, fit them through the handles and sew the straps together.


5. Glue the fabric straps to the book (Of course, you don’t do this for the clutch). And also glue the piece from step 4 onto the book. I use E6000, which is like the mother of all craft glues for this. Be warned though, it also smells like the mother of all craft glues.


6. Now set that aside to let it dry and we are going to make the insides of the purse. Get out a large piece of paper, or just tape two together like I have done half-assedly here. Trace the cover of your book on a large piece of paper, making sure to MARK both ends of the spine of the book on your paper.

7.Measure the width of one side of the book, and draw a line that is that same length about 75 degrees from where you marked the beginning of the spine. This angle controls how wide your purse will open. The smaller the angle the wider your purse will open.

8. Now you are going to duplicate the line to the other side by cutting out the line and the fold the paper over width-wise.


9. Now do the same lengthwise, so you reproduce the triangle on the other side also.

10. Cut two pieces of this out of the fabric for the lining of the purse.

11. Take one of the pieces of the fabric, with the right sides of the fabric facing each other, sew the edges of the triangles to the edges of the square.

12. Repeat with the other piece of fabric. Turn one of them inside out, you should now have something that looks like this picture.

13. Put the right side out piece inside the wrong side out piece, and sew around the top edge. You need leave a hole big enough for you to put hand though.

14. Put your hand through the hole you left, and turn the whole thing inside out. Stitch down the hole. You should now have something that looks like this. (I also topstitched around the top edge for a cleaner finish)

15. Sew velcor onto either side of the purse.

16. The end is near, can you feel it? Glue the insides to the book frame you created earlier. Hopefully, the glue will be dry already from the earlier step (if not, you should really wait for it to dry, this is advice coming from the world’s most impatient person, so trust it!)


17. Done!!


