a lot of you knew my project the minute it showed up.
i guess many of you, and others a like, liked it pretty well because it won this round over at sytyc!!! THANK YOU. :)
this tutorial will give you the basics on how to create your "snow" ruffle.
here are the steps i used to create my ruffles.
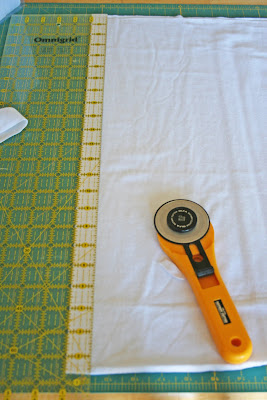
first cut strips that will be your ruffles. for this project i used flannel.
cut them at 1 inch width and the width of the fabric (usually 42 to 46 inches)
then cut them in half.
you will end up with two strips at 21 to 23 inches each by 1 inch.
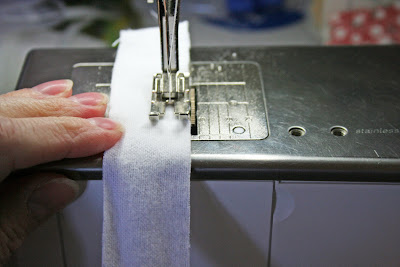
next with your sewing machine set to a running stitch (largest stitch, mine is a 5)
sew all the way down and make sure you leave some thread at the ends.
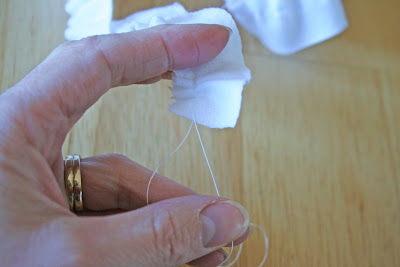
take the end strings and lightly pull ONE thread , this will gather your fabric. if you pull too quickly or tug too hard on it, it might break the thread.

you should end up with your fabric looking like this.
do this to as many ruffled flowers you would like to have.

next to create the ruffled flower, start by taking one end and wrapping around it like so.
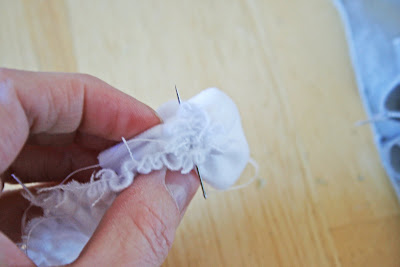
next you are going to hand sew your flower. with a needle you will go through from one side to the other, and back again. like the picture shown above. once you secure a few layers together, wind some more fabric around and continue the process of sewing through and securing a few layers at a time. your flower should stay formed once you are done winding all the fabric around, finish off your flower by tying a knot.

once your flower has been formed, you will want to secure it to your pillow top. this can be any size you desire. mine was roughly 14 by 10 inches for the small one and 15 by 15 inches for the large square one.
to secure your ruffled flower i started in the middle of each flower and hand sewed each one of them on, in the desired spot i wanted.

this is the picture of the larger pillow top. if you'd like to you could always secure it even more by hot glue-ing your already hand sewn on ruffles (i have three boys can you tell i have had somethings destroyed if i don't re-enforce things?)
once you have the design done and sewn on your pillow top. cut out the same size and shape for the back.
with right sides together, sew all four sides using a 1/4 inch seam allowance, leaving a hole at the bottom of your pillow.
pull inside out, stuff with poly fill and hand stitch closed.
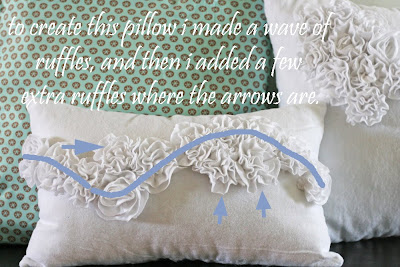
here's what i did to create the "snow drift" if you will. make a wave and add a few extra flowers where the arrows are.