Page principale  |  Contacte  

Adresse mail:

Mot de Passe:

Enrégistrer maintenant!

Mot de passe oublié?

LA CASITA DE MABELY
 
Nouveautés
  Rejoindre maintenant
  Rubrique de messages 
  Galérie des images 
 Archives et documents 
 Recherches et tests 
  Liste de participants
 COMO NAVEGAR EN LA CASITA 
 ENCUENTRO ESPECIAL CON DIOS 
 SEA UN ADODADOR 
 FACEBOOK 
 LA CASITA DE MABELY BLOGSPOT 
 TEJIDOS Y MANUALIDADES DE LA WEB 
 DE TODO UN POCO AQUI 
 REFLEXIONES,POEMAS 
 NUESTROS TRABAJOS 
 CROCHET 
 DOS AGUJAS 
 OTROS TEJIDOS 
 CROCHET BEBE 
 DOS AGUJAS BEBE 
 MACRAME 
 COSTURA 
 MUÑEQUERIA 
 OTRAS MANUALIDADES 
 RECICLAJE 
 MASCOTAS 
 ABALORIOS 
 BOLSAS DE TELA 
 BOLSAS TEJIDAS 
 PARA ELLOS 
 PARA EL HOGAR 
 NAVIDAD 
 REGALAME UN GIF 
 FONDOS 
 NAVIDAD 
 PUNTOS A CROCHET 
 PUNTOS DOS PALITOS 
 PUNTO TUNECINO 
 BORDADOS PUNTO CRUZ 
 BORDADO EN CINTA 
 OTROS BORDADOS 
 FRIVOLITE O TATTING 
 ALIMENTOS CURATIVOS 
 RECETAS DE COCINA 
 LA ADMINISTRACION 
 MATERIALES PSP 
 CUMPLEAÑOS 
 
 
  Outils
 
NAVIDAD: un arbolito bien original
Choisir un autre rubrique de messages
Thème précédent  Thème suivant
Réponse  Message 1 de 2 de ce thème 
De: perlita2  (message original) Envoyé: 22/09/2010 23:41

*This tutorial is intended for personal use only.**


Paper is a fantastic medium for creating quick and easy projects. I've chosen to use pastel colored card stock to make this cheerful Spring topiary. 


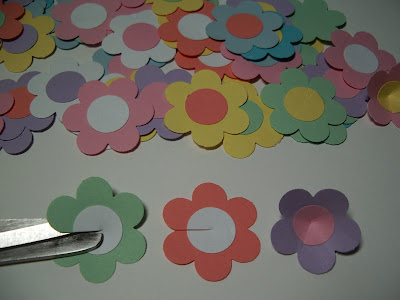
For this project, I am using a 1-1/4" 6-petal flower punch and a 5/8" circle punch. This is the perfect opportunity to use up those scrap pieces of card stock that you have laying around. Punch out as many as you think you will need for this project.


Glue the circles to the center of each flower. Cut a slit into the center between two petals. Overlap the petals, one over the other, and glue into place. 


You will also need straight pins and pearls for this project.


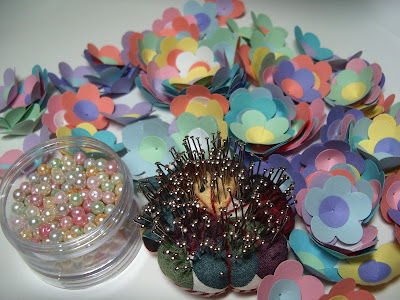
Place a pearl onto a straight pin and pass the pin through the center of each flower.


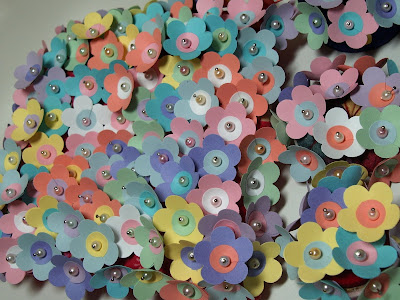
Aren't they pretty? It looks like sweet sherbety goodness to me!


Cover the styrofoam base by wrapping it with strips of fabric 1" in width. Secure the fabric into place with straight pins.


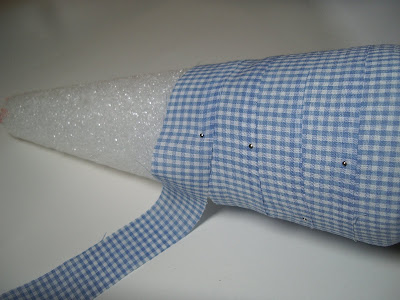
Arrange the flowers onto the base by pressing the pins into the styrofoam.


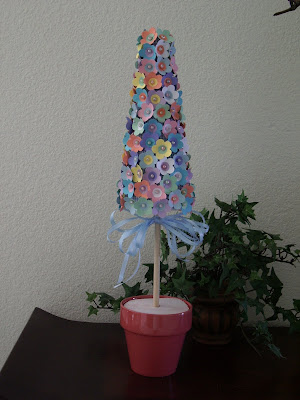
This is a very satisfying project that looks very labor intensive, but it's not. If you don't tell, I won't!
http://mousechirpy-polkadotpineapple.blogspot.com/2010/04/paper-flower-topiary.html


Premier  Précédent  2 à 2 de 2  Suivant   Dernier  
Réponse  Message 2 de 2 de ce thème 
De: cielito50 Envoyé: 24/09/2010 21:05


©2025 - Gabitos - Tous droits réservés