|
|
General: APPLE=STEVE JOBS=DA VINCI CODE=BITCOIN REVOLUTION=MARY MAGDALENE=ALCHEMY
Elegir otro panel de mensajes |
|
|



New International VersionIt is as if the dew of Hermon were falling on Mount Zion. For there the LORD bestows his blessing, even life forevermore.
New Living TranslationHarmony is as refreshing as the dew from Mount Hermon that falls on the mountains of Zion. And there the LORD has pronounced his blessing, even life everlasting.
English Standard VersionIt is like the dew of Hermon, which falls on the mountains of Zion! For there the LORD has commanded the blessing, life forevermore.
Berean Standard BibleIt is like the dew of Hermon falling on the mountains of Zion. For there the LORD has bestowed the blessing of life forevermore.
King James BibleAs the dew of Hermon, and as the dew that descended upon the mountains of Zion: for there the LORD commanded the blessing, even life for evermore.
New King James VersionIt is like the dew of Hermon, Descending upon the mountains of Zion; For there the LORD commanded the blessing— Life forevermore.
New American Standard BibleIt is like the dew of Hermon Coming down upon the mountains of Zion; For the LORD commanded the blessing there—life forever.
NASB 1995It is like the dew of Hermon Coming down upon the mountains of Zion; For there the LORD commanded the blessing— life forever.
NASB 1977It is like the dew of Hermon, Coming down upon the mountains of Zion; For there the LORD commanded the blessing—life forever.
Legacy Standard BibleIt is like the dew of Hermon Coming down upon the mountains of Zion; For there, Yahweh commanded the blessing—life forever.
Amplified BibleIt is like the dew of [Mount] Hermon Coming down on the hills of Zion; For there the LORD has commanded the blessing: life forevermore.
Christian Standard BibleIt is like the dew of Hermon falling on the mountains of Zion. For there the LORD has appointed the blessing — life forevermore.
Holman Christian Standard BibleIt is like the dew of Hermon falling on the mountains of Zion. For there the LORD has appointed the blessing— life forevermore.
American Standard VersionLike the dew of Hermon, That cometh down upon the mountains of Zion: For there Jehovah commanded the blessing, Even life for evermore.
Contemporary English VersionIt is like the dew from Mount Hermon, falling on Zion's mountains, where the LORD has promised to bless his people with life forevermore.
English Revised VersionLike the dew of Hermon, that cometh down upon the mountains of Zion: for there the LORD commanded the blessing, even life for evermore.
GOD'S WORD® TranslationIt is like dew on [Mount] Hermon, dew which comes down on Zion's mountains. That is where the LORD promised the blessing of eternal life.
Good News TranslationIt is like the dew on Mount Hermon, falling on the hills of Zion. That is where the LORD has promised his blessing--life that never ends.
International Standard VersionIt is like the dew of Hermon falling on Zion's mountains. For there the LORD commanded his blessing— life everlasting.
Majority Standard BibleIt is like the dew of Hermon falling on the mountains of Zion. For there the LORD has bestowed the blessing of life forevermore.
NET BibleIt is like the dew of Hermon, which flows down upon the hills of Zion. Indeed that is where the LORD has decreed a blessing will be available--eternal life.
New Heart English Biblelike the dew of Hermon, that comes down on the hills of Zion: for there the LORD gives the blessing, even life forevermore.
Webster's Bible TranslationAs the dew of Hermon, and as the dew that descended upon the mountains of Zion: for there the LORD commanded the blessing, even life for ever.
World English Biblelike the dew of Hermon, that comes down on the hills of Zion; for there Yahweh gives the blessing, even life forever more.
Literal Translations
Literal Standard VersionAs dew of Hermon—That comes down on hills of Zion, "" For there YHWH commanded the blessing—Life for all time!
Young's Literal TranslationAs dew of Hermon -- That cometh down on hills of Zion, For there Jehovah commanded the blessing -- Life unto the age!
Smith's Literal TranslationAs the dew of Hermon coming down upon the mountains of Zion: for there Jehovah commanded the blessing, life even forever.
Catholic Translations
Douay-Rheims Bibleas the dew of Hermon, which descendeth upon mount Sion. For there the Lord hath commandeth blessing, and life for evermore.
Catholic Public Domain VersionIt is like the dew of Hermon, which descended from mount Zion. For in that place, the Lord has commanded a blessing, and life, even unto eternity.
New American BibleLike dew of Hermon coming down upon the mountains of Zion. There the LORD has decreed a blessing, life for evermore!
New Revised Standard VersionIt is like the dew of Hermon, which falls on the mountains of Zion. For there the LORD ordained his blessing, life forevermore.
Translations from Aramaic
Lamsa BibleLike the dew of Hermon that falls upon the mount of Zion; for there the LORD commanded the blessing, even life for evermore.
Peshitta Holy Bible TranslatedLike the dew of Hermon that descends upon the mountain of Zion, because there LORD JEHOVAH commanded the blessing and the Life unto eternity.
OT Translations
JPS Tanakh 1917Like the dew of Hermon, That cometh down upon the mountains of Zion; For there the LORD commanded the blessing, Even life for ever.
Brenton Septuagint TranslationAs the dew of Aermon, that comes down on the mountains of Sion: for there, the Lord commanded the blessing, even life for ever.
Additional Translations ...
|
|
|
|
|
|
Golden Apple
The Mayan Omen
by Goro (goroadachi.com & supertorchritual.com)
October 02, 2012

Key Themes
- Royal, pregnancy/baby, Grail bloodline (resurrection)
- Martian Resurrection (life, panspermia, phoenix)
- "Birthquakes" (planetary pregnancy/birth expression)
- Plus: Underworld, Babylon/Tower of Babel; Venus; etc.
Projected Window
"...I'm going to go ahead and say that I see the latter part of August as a window for big things. Anchor dates ~August 24 and 29." - Aurora Code 2012 (7/21/2012)
"...I'm expecting a major development or impact related to all of this in some way around late August (anchor dates Aug 23-24 & 29)." - Olympics & Martian Resurrection (8/03/2012)
And now a brief summary of what has transpired...
since the Olympics.
* * *
Galactic Phoenix
Time: August 15, 2012
Themes: Phoenix/resurrection, Birth

Aug 15 Extreme Galaxy Cluster Birthing Stars at Excessive Rate
Aug 15 "Phoenix" Galactic cluster's 'starburst' surprise
Aug 15 Record-Breaking "Phoenix" Cluster
Phoenix and birthing. Echoing London...
Martian Coronation
Time: August 19, 2012
Themes: Mars, British Royal Family, Olympics
 
Aug 19 Curiosity Fires First Laser Beam at Rock "Coronation"
Aug 19 Pew! Pew! Pew! Curiosity Zaps Mars Rock with Laser
Mars and "Coronation" (name of the rock). Echoing London...

From Etemenanki's Aurora Code 2012 (7/21/2012):
...Here we are in 2012, just days away from the London Olympics, and "signs" such as the Aurora mass shooting keep pointing to the same storyline, the focus more on royal pregnancy than coronation per se though that's exactly what we see depicted in the London Olympic logo (as I interpreted it back in 2007)...
The Martian rock also alludes to the "Stone of Scone" aka "Stone of Destiny" aka "Coronation Stone" in Scotland where Diana-William-(Kate)-baby's Stuart royal bloodline originally ruled on the throne.


Having traditionally been associated with Jacob's pillow stone and through which Jacob's Ladder ("stairway to heaven"), the Coronation Stone is more or less analogous to a "stone fallen from heaven" making it interchangeable with the likes of the Grail and the Benben Stone which was the archetypal pyramid capstone...
 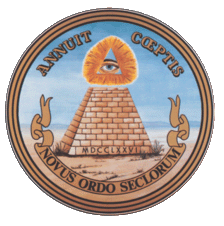
On September 22-24, the first rock NASA selected for Curiosity to physically touch and examine on Mars was pyramid-shaped.

Sep 21 Curiosity Targets Unusual Rock
Sep 24 Curiosity Touches 1st Martian Rock
Sep 24 Curiosity Finishes Close Inspection of Rock Target
On Mars, these are literally "heavenly stones".
Marsquake
Time: ~August 17-20, 2012
Themes: Mars, Birthquake
Royal Triple X
Time: Aug 22~ & Sep 14~, 2012
Themes: British Royal Family, Olympics, pentagram

Aug 22 Naked Prince Harry photos published online
A few weeks later...

Sep 14 Duke and duchess sue French magazine Closer
Royalty and XXX (pornographic), a clever pun on the official designation of the London Olympics, "the Games of the XXX Olympiad" ("XXX" = "30").
 
- 2012 Olympics = Games of the XXX Olympiad
- Olympics logo containing 2 "Z"s & stylized "crown"
- ZZ Top 1999 'XXX' album cover featuring crown
- Prince William turns 30 (= XXX) in 2012
Like the Royal Wedding and many other key events surrounding William & Kate...

...Prince Harry's Vegas incident was pinpointed by a pentagram.


It was also celestially pinpointed by the Sun's conjunction with Leo's brightest star Regulus, also known as... "Prince."

This was a key data point in the forecasting of the late-August window (specifically mentioning these dates).
Death of Moonwalker
Time: August 25, 2012
Themes: British Royal Family (Diana), Birth
Highlighting not only the Moon goddess Diana...

...but also the Aurora mass shooting this summer on the 43rd anniversary of the historic Moon landing (July 20). As discussed before, "Aurora" happens to be the name of a pregnant girl in Babylon A.D. who gives birth to messianic twin babies.

Michael Jackson is another famous "Moonwalker" whose birthday August 29 coincides with our second anchor date of the window.
Martian William
Time: August 28, 2012
Themes: Mars, British Royal Family (William)

Aug 28 will.i.am teams with NASA to debut song from Mars
William (will.i.am) and Mars.... Just days after Curiosity's interaction with the Martian "Coronation Stone." Basically implying "Coronation of Martian Prince William" or more archetypally the rebirth of the Jacobite "Grail" bloodline on the throne.
The very next day, or simultaneously on August 28-29, the birth (water breaking) event took place...
The Isaac Code
Time: ~August 26-29, 2012
Themes: British Royal Family (Kate), Birth, Apple
Right on "August 29"...
 Aug 26 Isaac Death Toll In Haiti Rises To 9 Aug 26 Isaac Death Toll In Haiti Rises To 9
Aug 26 Tropical Storm Isaac Should Rival Hurricane Katrina
Aug 27 Eerie similarities: Isaac follows track of Katrina
Aug 27 Isaac churns in Gulf along Katrina's path
|
|
|
|
|

Aug 28 Isaac makes landfall in southeastern Louisiana
Aug 28 Isaac hits US Gulf Coast, heads for New Orleans
Aug 29 Hurricane Isaac makes 2nd landfall
Aug 29 Storm surge overtops levee, 12-foot flood...

Aug 30 Dam Failure Feared After Tropical Storm Isaac
Everyone could see that Isaac was a Katrina clone, ravaging the same region on the same date, exactly 7 years later. An echo anticipated in Aurora Code 2012 (7/21/2012):
August 29 - Babylon A.D. release date - adds to the pregnancy/birth theme as it is the birthday of the ancient Egyptian goddess Hathor, associated with the Milky Way/Nile and the flood ("water breaking") and considered a herald of imminent birth.
In 2005, August 29 was the exact date of New Orleans' "water breaking" impact moment when Hurricane Katrina made landfall there... right at the midpoint of a Galactic-Mayan timeline directly involving the year 2012.

"Katrina" means "Catherine" as in Catherine"Kate" Middleton, i.e. the UK princess whose pregnancy/childbirth we've been long projecting for the Mayan window of 2012-2013 on our sites (Etemenanki/STRUG). [...]
"Maya" is today Mexico [as in "Gulf of Mexico"] and the name "Mexico" via Mextli refers to a "god of war" which in Roman mythology is Mars. "Mexico" via Mexihco means "Place at the Center of the Moon" implying "in the womb of Diana". [...]
...I'm going to go ahead and say that I see the latter part of August as a window for big things. Anchor dates ~August 24 and 29.

So we had the symbolism down beforehand and Isaac was a dramatic pattern fulfillment, the reality of which was confirmed and enhanced by additional eye-popping clues dropped on the other side of the Atlantic that same day...
It was the Paralympics opening ceremony in London on August 29 where Isaac Newton was being honored for his contribution to the expansion of human knowledge.

[Graphic from Paralympics opening ceremony]
Two Isaacs, same message. Isaac Newton is all about gravity and the (falling) apple, implying the following:
- "Gravity" is related to the Latin word gravidity (meaning "heavy") which is a scientific term for the state of pregnancy.
- "Apple" is the meaning of the term "Avalon" which is King Arthur's mythical "underworld" where he is said to be hibernating and would return from as the Once and Future King ("rebirth"), i.e. a drama unfolding at this time semi-literally through the rise of the Kate-William-baby trinity.

[Many apples during Paralympics opening ceremony]

A big exclamation mark came toward the end of the show in the form of a giant naked, pregnant woman based on an actual sculpture in London called "Alison Lapper Pregnant". I'm not kidding, see for yourself:

She was the centerpiece of the closing phase of the ceremony. For much of the duration of the show, however, the centerpiece was... the Moon.
The whole ceremony was lunar, and it was in London... together evoking Princess Diana. In this way, we were given another confirmation that the prevalent pregnancy/birth motif pertains mainly (but not exclusively) to the late princess's Arthurian descendants/family/bloodline. Kate Middleton while not related by blood is a worthy successor to Diana and is more than ready to bring a new life into this world with Prince William. My projection has always been that she would likely get pregnant in 2012 and give birth in the 2012-2013 time frame (naturally looking at 2013 now).
We are talking "Grail bloodline" here and there was a blatant foreshadowing in the form of NASA's GRAIL twin probes entering orbit around the Moon right at the start of 2012 on New Year's Eve/Day. "GRAIL" here stands for "Gravity Recovery and Interior Laboratory".
As it happens August 29 is also New Year's Day ("1 Thoth") of the (Alexandrian) ancient Egyptian calendar. In ancient Egypt New Year's Day signified rebirth via the combination of the heliacal rising of Sirius and the annual inundation ("water breaking") of the Nile.
Everything fits just beautifully. Pattern projected and fulfilled. At this stage there should be no denying that the pattern is real.
Golden Apple
We can start looking ahead using the same general pattern and specifically the golden apple which was conspicuously floating around at the opening ceremony on August 29.

Thrown into a party, a golden apple becomes an unmistakable omen.... hinting at what amounts to a world war. Great chaos. That's the basic story of the Golden Apple of Discord in Greek mythology: goddess Discordia/Eris throws a golden apple with the inscription "for the fairest" into a wedding banquet, followed by a beauty contest, then the "abduction" of Helen as a direct consequence, sparking the Trojan War (ancient world war).
From my multicontextual point of view, it's no coincidence that the first impact event of 2012 was the Costa Concordia cruise ship disaster off Italy. "Concordia" is obviously the opposite (= upside down, like the wrecked ship) of "Discordia" (Eris) who threw the golden apple. Strong resonance there.
No coincidence especially if you take into account the fact that London was originally called "New Troy" according to legend...

...and the fact that soon after the Paralympics great chaos was unleashed in the world starting around 9/11 (= big chaos/war date) coinciding with another big "Apple" event (iPhone 5):


Orange Alignment
Time: ~October 20, 2012
Themes: Golden apple/Orange, Chaos, Birthquake
For many years now we've been tracking what we call the "Orange Alignment" i.e. a heliocentric lining up of Venus, Sun and Mercury. I've shown many times before that when they come, we do feel their impact. It is my view that the next one coming up soon is a highly charged one... because, for one, in many languages the fruit orange is called... "golden apple".
 
The Orange Alignment will be formed in our solar system on ~October 20, 2012, like this:
Making it even more ominous, the alignment angle pinpoints the Earth's orbital position on January 12-13 (annual), which is the exact date of this year's Costa Concordia disaster (= Discordia => golden apple/orange) as well as the devastating Haiti earthquake (Birthquake) back in 2010. (Orange Alignments are often "earth changes" markers.)

That, to me, just does not look good. Some kind of big impact appears to be in the offing there (directly or indirectly) and I would expect it to continue to express the same underlying themes, but more intensely. Hopefully it's more about things like the Royal Pregnancy, Mars, etc. rather than severe earth changes, war, and such. There are obviously many possible scenarios and we may well be looking at multiple events (or just strong signals) unfolding simultaneously or in quick sequence.
I should also mention that there are other aspects of the whole golden apple business that points its temporal finger squarely at the year 2013. As well, before we even get there we'll have... certain things coming later this year which we'll need to talk about soon.
Enough for now. Thanks for reading!
https://www.goroadachi.com/etemenanki/golden_apple.html |
|
|
|
|
First, NYC/Long Island can be associated with 'knowledge' through the symbolisms of 'apple' ("Big Apple"), 'rose' (state flower), 'fire' (Statue of Liberty, its connection to Paris/'torch'), etc. and as we've seen in foregoing sections it's part of the 'ark' complex via VI-97. Furthermore from the 'apple' connection follows the notion of the 'serpent'. Now, all those 'knowledge'/Sirius connections of NYC can be transferred to Mars because, as illustrated in 'Babylon Matrix', NYC is also related to Mars, especially the Cydonia region with all the potentially artificial structures. Mars being red and circular is associatable with the 'apple', the red and round 'Big Apple' (NYC). Now, some might argue that the fruit Eve ate was not necessarily an 'apple', but we generally thought of it as an apple today and that has to count in symbolism. But there is a much more precise connection - the latitudes of NYC and Cydonia are exactly the same, 40.5~41N.
The events closely associated earlier with X-72 and more or less with the ark, the two random shootings in a library and school ('Resonance' #7 and 8), appear to back up the Mars-Sirius connection also. Those two similar events, only five days apart, occurred one on the Cydonian latitude and the other on the Sirius 'angle' latitude. The Mormon library shooting took place at ~40.5N, and the Colorado school shooting at ~39.5N. The name 'Salt Lake City', where the library shooting occurred, may be relevant also since mythologically the 'salt water' is of female - and Sirius is filled with female associations ('goddess', 'star of Women', etc.).
Moreover, Temple mentions in his book that "when making rhetorical allusion to the Dog Days, the Latins would often speak of Sirius being red at the time..." Now, this is quite significant for not only is Sirius described as 'red' like Mars, but the "Dog Days" would refer to a period in or around July - the exact time-frame indicated by Quatrain X-72.
The Sirius-correlated Argo also turns out to be very relevant here. Because the main mission of Jason, the leader of the Argonauts who has been identified as the "appeasing King"/"King of terror" of X-72 earlier, was to obtain the 'golden fleece', and in Temple's words, "Aries was definitely identified with the golden fleece". In case you don't know, Aries is the Greek Mars. Aries is also a sign of the zodiac, "ruled" by Mars, and it is classified as a 'fire sign' - correlating with the fire-knowledge symbolism. I should also point out that Mars is called 'fire star' in Japanese.
Moreover, Sirius/Isis' son Horus provides intriguing correlations. First, the Great Sphinx associated earlier with 'ark' was called by Egyptians "Horus of Horizon" which also happens to be a name given to Mars. And the word 'Cairo', where the Sphinx is (actually slightly west of Cairo), is derived from 'Mars'. Mars was also called 'Horus the Red'. And the word 'Heru' (Egyptian name for Horus) also has the meaning of 'face' - seemingly a reference to the infamous 'Face on Mars' at Cydonia! (So, as you can see, the Mars-Horus connection is quite obvious.) Next, Sirius/ark comes into the web of associations, as the Argo also relates to Horus (thus to Mars too) as the Greek derivation of Horus, 'Circe', plays a prominent role in the story of Argo. Also, as Temple hypothesizes, the names of the original captain of Argo, Herakles, and his protectress Hera may be derived from 'Heru' - the Egyptian name for Horus. Furthermore, we're told that Herakles/Hera is related to the word 'Seirios' from which we have the word 'Sirius' - strengthening the Mars-ark-Sirius connection. But as if it wasn't enough, Temple goes on to point out that 'Seirios' also has the meaning of 'fiery/scorching', that can easily be a reference to Mars.

And finally, Mars and Sirius are linked by the 'tetrahedral angle' of 19.5 degrees. '19.5 degrees' is one of the most significant notions derived from the supposed artificial structures of Cydonia that suggests their artificiality, according to investigators like Richard Hoagland ('The Monuments of Mars'). It is viewed as a definite 'signal in the noise' - some kind of a 'message' left there by some intelligence. This number, '19.5', is called t, the 'tetrahedral constant', because of  its significance in tetrahedral geometry (a tetrahedron is a pyramid shape composed of four equilateral triangular sides): the apexes of a tetrahedron when placed within a circumscribing sphere, one of the tetrahedron's apexes touching the south (or north) pole, the other three apexes touch the surface of the sphere at 19.5 degrees north latitude. So it is interesting that the Egyptian symbol for Sirius is a triangle which can be viewed as a 2-dimensional representation of a tetrahedron. its significance in tetrahedral geometry (a tetrahedron is a pyramid shape composed of four equilateral triangular sides): the apexes of a tetrahedron when placed within a circumscribing sphere, one of the tetrahedron's apexes touching the south (or north) pole, the other three apexes touch the surface of the sphere at 19.5 degrees north latitude. So it is interesting that the Egyptian symbol for Sirius is a triangle which can be viewed as a 2-dimensional representation of a tetrahedron.
https://www.goroadachi.com/etemenanki/1999-sirius.htm |
|
|
 Primer Primer
 Anterior
46 a 60 de 60
Siguiente Anterior
46 a 60 de 60
Siguiente
 Último

|
|
| |
|
|
©2025 - Gabitos - Todos los derechos reservados | |
|
|

