|
|
| De: timber (Mensagem original) |
Enviado: 22/01/2021 05:15 |
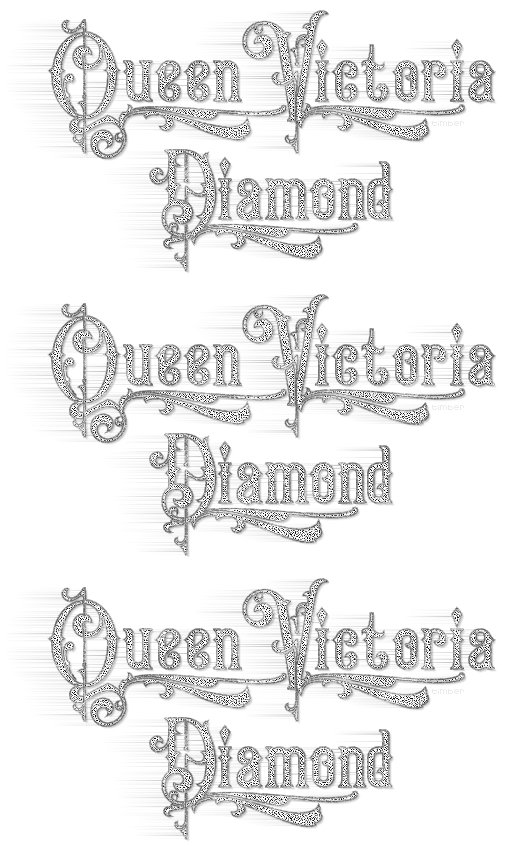
This tutorial will show you how you can create a diamond text effect  using built-in PSP filters exclusively. I used Eye Candy 4000 for the Motion Trail but the rest of the tag is plugin free using built-in PSP filters exclusively. I used Eye Candy 4000 for the Motion Trail but the rest of the tag is plugin free  . Throughout my testing I found the fonts that looked best to me are thinner fonts of varying height otherwise the motion trail is one big drag . Throughout my testing I found the fonts that looked best to me are thinner fonts of varying height otherwise the motion trail is one big drag  LOL. LOL.
This tutorial is written mostly in my own notes and not as a formal tutorial, so you will need a comfortable working knowledge of your PSP tools, layers, palettes, etc. I will include some menu paths and screenshots, but not many. Since I make multiple tags for tag offers, I create a script to make my tag making faster, so I will provide that script for you. You should be comfortable using scripts before trying this. As always if you run into any trouble, then just ask  . . |
For this tutorial, you will need:
Paint Shop Pro (version 8 or higher)
Eye Candy 4000 (or Eye Candy 3) Motion Trail
Animation Shop
Supplies here:
Canvas 01 Pattern: place in the Patterns folder
Gold Texture Pattern: place in the Patterns folder
Queen Victoria Swash Font: open and minimize
tbt-QueenVictoriaDiamondText-script: place in the Scripts-Restricted folder
tbt-QueenVictoriaDiamondText-layers: open in PSP |
TEXT TOOL: Create as vector, Queen Victoria Swash, size=85, stroke=0
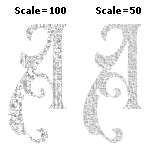
MATERIALS: BGmaterial=pattern (Canvas 01, scale=50)
Note: Complete the steps as indicated except for the steps between ~RUN SCRIPT and ~END SCRIPT. Those steps are run by the script, so you will ignore those if you're running the script. You will pick up again after ~END SCRIPT and complete any tutorial steps.
- text layer; type text (adjust kern as needed);
Before running the script check to see that the pattern scale is at 50. Sometimes the scale is changed back to its original scale of 100.
~RUN SCRIPT: tbt-QueenVictoriaDiamondText-script
- center on canvas; duplicate;
- layer properties (name=gold); object properties (stroke=gold_texture pattern, fill=null, width=2); duplicate;
- layer properties (name=outline, blendmode=multiply); object properties (stroke=#606060, fill=null, width=0.3); duplicate;
- layer properties (name=noise, blendmode=screen); object properties (stroke=black, fill=black, width=1.5); convert to raster; duplicate twice; add noise (gaussian, 80, mono); hide layer;
- copyofnoise layer; repeat noise; hide layer;
- noise layer; repeat noise;
- gold layer; convert to raster; adjust brightness/contrast (25,25); colorize (0,0);
- text layer; convert to raster; sharpen two (2) times; duplicate;
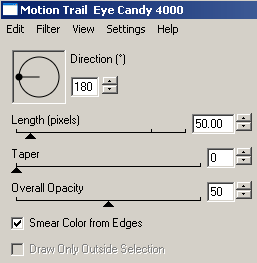
- layer properties (name=motion trail); move down; ec4k motion trail (180,50,0,50, smear color from edges);
- text layer; sharpen two (2) times; shadow (2,2,20,2,black, on new layer checked);
- watermark layer;
~END SCRIPT
- place watermark; hide background;
- crop;
I like to Snap crop rectangle to: Merged Opaque then edit the positions of Left, Top, Right, and Bottom as: L-1, T-10, R+20, B+10. Negative values are subtracted and positive values are added. This gives me some space around my tag.
- copymerged;
|
Animate the Text
- in AS, paste as new animation;
- back in PSP, hide noise layer; unhide copyofnoise layer; copymerged; in AS, paste after current frame;
- back in PSP, hide copyofnoise layer; unhide copy2ofnoise layer; copymerged; in AS, paste after current frame;
- save as octree, error diffusion

You may offer your results wherever you wish, but you may not sell for profit.
This tutorial was written by timber on January 21, 2021. |
|
|
|
 Primeira
 Anterior
2 a 7 de 7
Seguinte
 Última

|
|
|
|
De: justjam |
Enviado: 22/01/2021 22:13 |
Great tut timber and so easy! Your scripts make tagging a breeze. I did not understand
# 14. crop. L-1, T-10,R+20, B+10. Thanks for posting this for us.
Here are the results of my first try. I am going to try more fonts. 
|
|
|
|
|
|
De: timber |
Enviado: 22/01/2021 23:11 |
Thank you so much for trying this tutorial and testing my script, Judy!  Oops!  It looks like I forgot to mention  that after hiding the background I Snap Crop Rectangle to: Merged Opaque. Then I edit the crop rectangle settings as L-1 (subtract 1 pixel from left), T-10 (subtract 10 pixels from top), R+20 (add 20 pixels to right), B+10 (add 10 pixels to bottom). I probably should have just said "crop"  LOL, but I left the crop settings that I use. I'll add a note for cropping to merged opaque  , thanks for catching that!  Isn't it fun to use scripts? Gosh they make tagging sooo fast! I love to watch the tag appear in a flash  . I would love  to see what other fonts you find to use  .  |
|
|
|
|
|
De: justjam |
Enviado: 23/01/2021 02:44 |
I had another play with a pay font called Butterfly Monogram from Creative Fabrica Here
I made a J and a T avatar. One for you and one for me, Lol
Here is yours: 
This is how the J turned out.
Thanks again for this cool tut, timber. It is so quick with your script!
|
|
|
|
|
|
De: timber |
Enviado: 23/01/2021 03:20 |
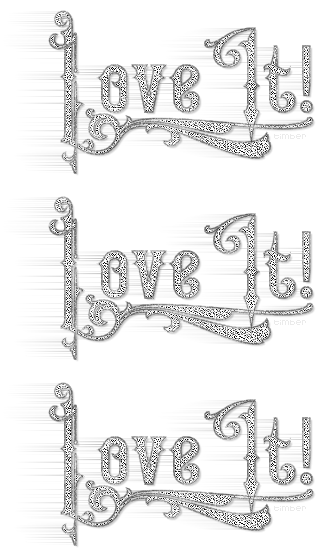 WOW, that's so pretty, Judy, I love it!   Thanks so much for making one of these gorgeous monograms for me!  I just looked and that font is $12.00  . You're very welcome for the script!  |
|
|
|
|
|
De: Daphne70 |
Enviado: 07/02/2021 23:24 |
Timber, forgot to add the text I made with the beautiful Queen Victoria Font, but nothing as dgood as yours, so need to learn how ..  |
|
|
|
|
Another of my favourites and hopefully looking better this time
|
|
|
 Primeira
 Anterior
2 a 7 de 7
Seguinte
 Última

|

