
You may print this out for your own personal use, but please do not rewrite, translate, e-mail out, offer any part of this on any other site, add to a CD, or claim this as your own. Your finished result is yours to do with as you please, including making tags and/or snags for others. You may offer your results wherever you wish, but you may not sell for profit. This tutorial was written by timber on January 20, 2007.
I wrote this tutorial using PSP8 and Animation Shop 3.10 with the beginner-level PSPer in mind, so it includes lots of screenshots and details. Unless I say otherwise, all 'clicks' are with the left mouse button. I have included keyboard shortcuts for the steps in parentheses ( ).
For this tutorial, you will need:
Paint Shop Pro
Animation Shop
Swenson font |
| 1. Open PSP and Animation Shop (AS). Open your font and minimize it to the taskbar. |
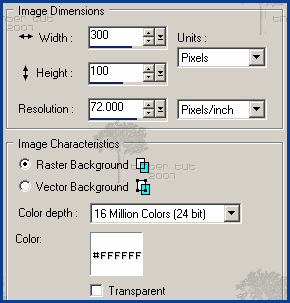 |
2. In PSP, create a new image  (canvas) 300x100 with a white background. (canvas) 300x100 with a white background.
File > New (Ctrl+N) |
3. Load the Text tool  (T) and apply these settings* (all other settings on the toolbar should be default settings). (T) and apply these settings* (all other settings on the toolbar should be default settings).

*If you're using PSP 10/11/12, your text size is rendered differently than mine, so instead of using size 64, try size 85.
If you would like thicker text, set the Stroke width between 0.5-1.0. |
 |
4. On the Materials palette, set the background color to white.
If your Stroke width is greater than 0.0, then set the foreground color to white also. |
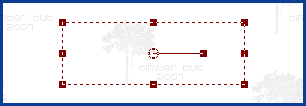 |
5. Click on the canvas, type your name into the Text Entry box, and click Apply.
Center the text on the canvas  . .
Objects > Align > Center on Canvas
 |
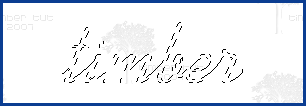 |
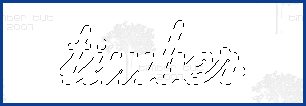
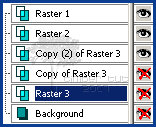
6. Select the vector text  and convert it to a raster layer and convert it to a raster layer  . .
Selections > From Vector Object (Ctrl+Shift+B)
Layers > Convert to Raster Layer |
 |
7. Add a new raster layer  . .
Layers > New Raster Layer

Expand the selection  by 2 pixels. by 2 pixels.
Selections > Modify > Expand |
8. Load the Flood Fill Tool  (F) and apply these settings. (F) and apply these settings.
 |
 |
9. On the Materials palette, set the foreground color to #00A0C6.

Flood the selection with the foreground color. |
 |
10. Add a new raster layer  . .

Expand the selection  by 3 pixels. by 3 pixels. |
 |
11. Set the foreground color to #0B3D91 and flood the selection.
 |
 |
12. On the Layers palette, click and drag the Raster 3 layer below the Raster 1 layer.
 |
 |
13. Now drag Raster 2 below Raster 1.

Click on Raster 3 to make it active.
 |
 |
14. Apply these Drop Shadow  settings. settings.
Effects > 3D Effects > Drop Shadow
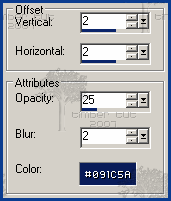 |
 |
15. Duplicate Raster 3 twice.
Layers > Duplicate
Layers > Duplicate
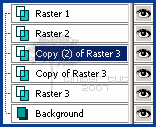 |
 |
16. Apply these Noise  settings to Copy (2) of Raster 3. settings to Copy (2) of Raster 3.
Adjust > Add/Remove Noise > Add Noise
 |
 |
17. Hide Copy (2) of Raster 3 by clicking on the eye symbol next to the layer. Make Copy of Raster 3 active and apply the same Noise  settings as above. settings as above.
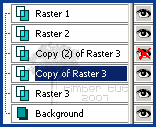 |
 |
18. Hide Copy of Raster 3 and make Raster 3 active.
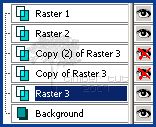
Apply the same Noise  settings as above and deselect settings as above and deselect  . .
Selections > Select None (Ctrl+D) |
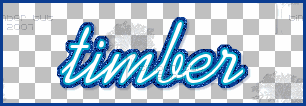 |
19. Hide the Background layer.
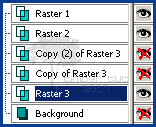
If you would like your tag on a white background, omit this step. |
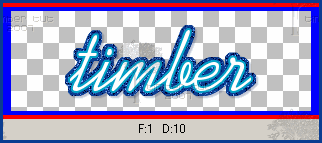 |
20. Copy the merged layers  . .
Edit > Copy Merged (Ctrl+Shift+C)
In AS, paste as a new animation  . .
Edit > Paste > As New Animation (Ctrl+V) |

(Screenshot not actual size) |
21. Back in PSP, hide Raster 3 and unhide Copy of Raster 3.
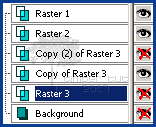
Copy the merged layers  , and in AS, paste after the current frame , and in AS, paste after the current frame  . .
Edit > Paste > After Current Frame (Shift+Ctrl+L) |

(Screenshot not actual size) |
22. Back in PSP, hide Copy of Raster 3 and unhide Copy (2) of Raster 3.
Copy the merged layers  and paste in AS after the current frame and paste in AS after the current frame  . . |
23. Crop your animation by double-clicking on the Crop icon on the Tool Palette.

Choose "Surround the opaque area" and click OK.


If your tag has a white background, then load the Crop Tool (by clicking on the Crop icon). Click and drag on your animation to form a square around your text. |
 |
24. Double-click within the crop square to crop (or press the Crop button). |
25. Save your animation  . .
File > Save (Ctrl+S)
Click on the Customize button.
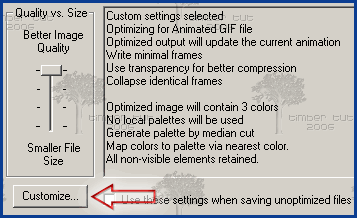
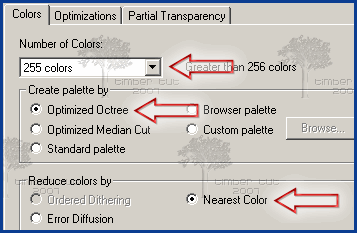
Click on the Colors tab and apply these settings.
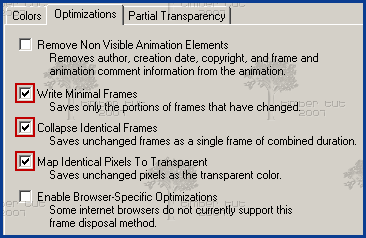
Click on the Optimizations tab and apply these settings.
Click on the Partial Transparency tab and apply these settings.
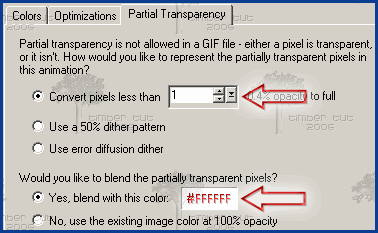
Click OK.
Click Next.
Click Next.
Click Next.
Click Finish.
YOU'RE DONE!!!
 |
I call this the American Idol siggy, because I used the AI font and colors from their logo, but you can use a different font and colors just as well. I've experimented with both thick and thin fonts, and I find that thin fonts look best. Here are a couple examples.
Words of Love font using pink colors (#FCADCA and #F14D72)

DJ Bumble font using green colors (#A1E034 and #6DB100)
 |
I'd love to see your results!
You can post them with the other member results
HERE |

