Continued from Page 1 |
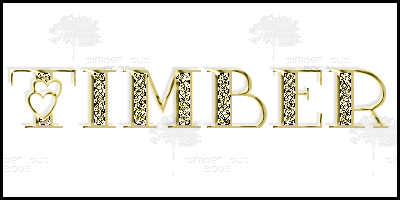 |
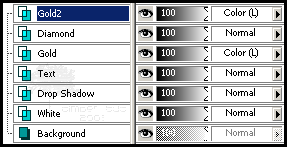
24. Make Gold2 active.
Flood Fill  the selection with the foreground color. the selection with the foreground color. |
25. Make Diamond active.
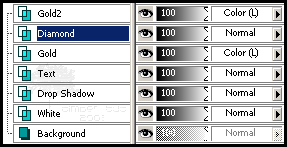
I'm going to add some Noise to give the "diamonds" a sparkle effect. But first I want to lighten the diamonds,
because adding the PSP Noise will make the diamonds darker. If you want a darker look to your diamonds,
then skip to step #26 here.
I will be using the DSB Flux Bright Noise filter to lighten my diamonds.
If you don't have the Bright Noise filter, then skip to step #25a and follow the alternate instructions.
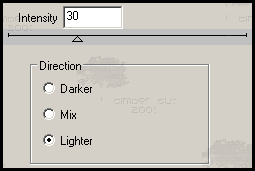
Add these Bright Noise settings.
Effects > Plugins > dsb flux Bright Noise
Deselect  . .
Selections > Select None (Ctrl+D)

25a. If you don't have the Bright Noise filter, and you want to lighten the diamonds
before adding PSP Noise, you can use this noise pattern to flood fill the selection.
To use the noise pattern, right-click and save to your computer.
Open the pattern (tbt-noise.gif) in Animation Shop (it will have a transparent background).
Copy  (Ctrl+C) and Paste in PSP as a New Image (Ctrl+C) and Paste in PSP as a New Image  (Ctrl+V). (Ctrl+V).
|
 |
On the Materials palette, change the
diamond pattern to the noise pattern
(Angle=0, Scale=100).

Flood Fill  the selection with the background pattern. the selection with the background pattern.
Deselect  . .
Selections > Select None (Ctrl+D) |
|
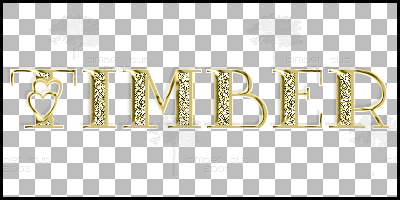 |
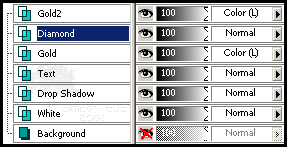
26. Hide the Background.
 |
| Animate the Text |
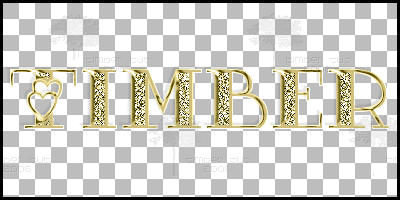 |
27. Add these Noise  settings. settings.
Adjust > Add/Remove Noise > Add Noise
 |
28. Copy the Merged  image. image.
Edit > Copy Merged (Ctrl+Shift+C)
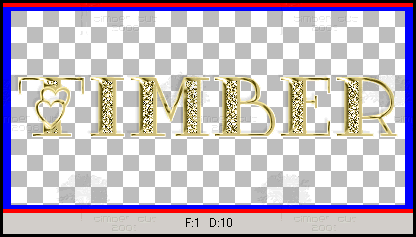
In AS, Paste as a New Animation  . .
Edit > Paste > As New Animation (Ctrl+V)
 |
29. Back in PSP, Undo  the noise. the noise.
Edit > Undo Add Noise (Ctrl+Z)
Now add the same Noise  setting again. setting again.
Tip: A quick way to add the same Noise setting again
is to hold down the Shift key and click the Noise button
(either on a toolbar or on the drop-down menu).
Copy the Merged  image, and in AS, Paste After the Current Frame image, and in AS, Paste After the Current Frame  . .
Edit > Paste > After Current Frame (Shift+Ctrl+L)

(Screenshot not actual size) |
30. Repeat step #29.

(Screenshot not actual size) |
| Crop and Save the Animation |
31. Crop the animation by double-clicking on the Crop icon on the Tool Palette.

Choose "Surround the opaque area" and click OK.


(Screenshot not actual size) |
32. Double-click within the crop square to crop (or press the Crop button).

(Screenshot not actual size) |
33. Save the animation  . .
File > Save (Ctrl+S)
Click on the Customize button.
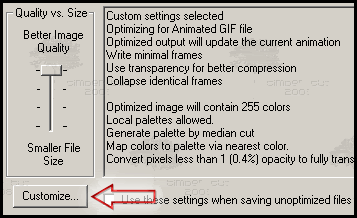
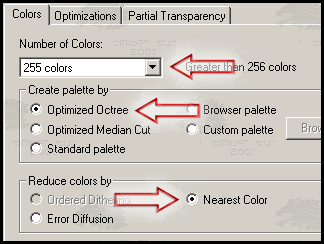
Click on the Colors tab and apply these settings.
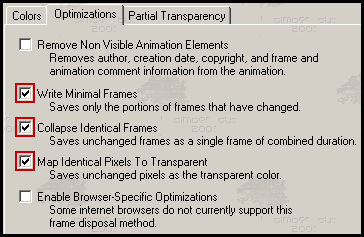
Click on the Optimizations tab and apply these settings.
Click on the Partial Transparency tab and apply these settings.
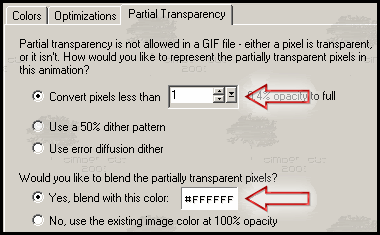
Click OK.
Click Next.
Click Next.
Click Next.
Click Finish.
YOU'RE DONE!!!
 |
| Variations |
 |
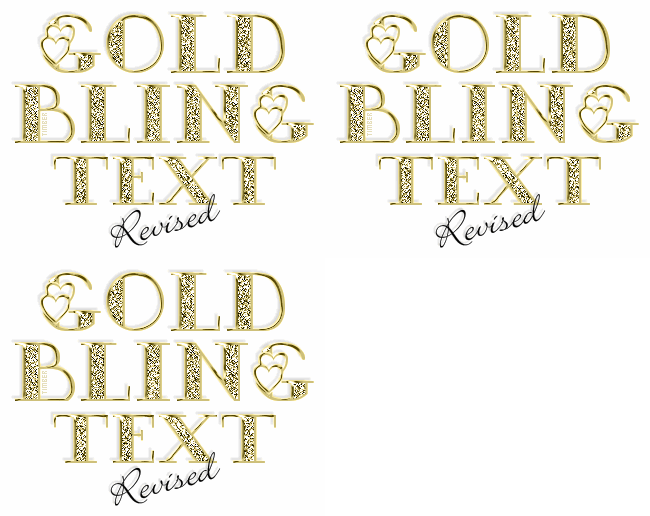
For this example, I used DSB Flux Bright Noise (settings: 30, Mix) instead of PSP Noise. The difference is very subtle; it's more of a shimmer than a sparkle. Just substitute Bright Noise for the PSP Noise in steps #27-30. |
 |
For this example, I hid  the White layer after hiding the Background layer in step #26 (then continued at step #27 as normal). Doing this will give a thicker appearance to the gold outline. the White layer after hiding the Background layer in step #26 (then continued at step #27 as normal). Doing this will give a thicker appearance to the gold outline. |
 |
For this example, I Flood Filled  the selections of the Gold and Gold2 layers with color #CFAC56 (4th row down and 4th column from the right on the color palette). I think this one looks like a shiny penny. the selections of the Gold and Gold2 layers with color #CFAC56 (4th row down and 4th column from the right on the color palette). I think this one looks like a shiny penny. |
 |
For this example (which reminds me of sterling silver), I hid  the Gold layer. For the Diamond layer, I changed the Angle of the diamond pattern to 180. For the Gold2 layer, I Flood Filled the Gold layer. For the Diamond layer, I changed the Angle of the diamond pattern to 180. For the Gold2 layer, I Flood Filled  the selection with color #CDCDCD and changed the Blend Mode to Overlay. I omitted the diamond lightening step (step #25). When saving this tag, choose Optimized Median Cut (instead of Optimized Octree) on the Colors tab. the selection with color #CDCDCD and changed the Blend Mode to Overlay. I omitted the diamond lightening step (step #25). When saving this tag, choose Optimized Median Cut (instead of Optimized Octree) on the Colors tab. |
 |
For this example (which reminds me of white gold), I changed the Blend Mode of the Gold layer to Soft Light (I used the same gold color from step #20). For the Diamond layer, I changed the Angle of the diamond pattern to 270. For the Gold2 layer, I Flood Filled  the selection with color #D4D0C0 and changed the Blend Mode to Overlay. I omitted the diamond lightening step (step #25). When saving this tag, choose Optimized Median Cut (instead of Optimized Octree) on the Colors tab. the selection with color #D4D0C0 and changed the Blend Mode to Overlay. I omitted the diamond lightening step (step #25). When saving this tag, choose Optimized Median Cut (instead of Optimized Octree) on the Colors tab. |
 |
For this example, I hid  the White layer after hiding the Background layer in step #26 (then continued at step #27 as normal). All other settings are the same as the tag directly above. When saving this tag, choose Optimized Median Cut (instead of Optimized Octree) on the Colors tab. the White layer after hiding the Background layer in step #26 (then continued at step #27 as normal). All other settings are the same as the tag directly above. When saving this tag, choose Optimized Median Cut (instead of Optimized Octree) on the Colors tab. |
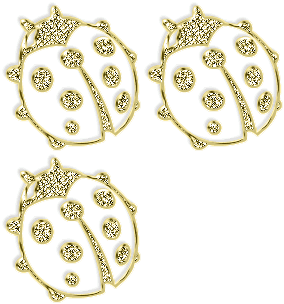 |
Thank you  to Vicky B. for coming up with the idea to use a dingbat font for this technique! For this example. I used a dingbat font, Ladybug Dings (capital D) size 100. All other steps of the tutorial are the same. to Vicky B. for coming up with the idea to use a dingbat font for this technique! For this example. I used a dingbat font, Ladybug Dings (capital D) size 100. All other steps of the tutorial are the same. |
I'd love to see your results!
You can post them with the other member results
HERE |

