
You may print this out for your own personal use, but please do not rewrite, translate, e-mail out, offer any part of this on any other site, add to a CD, or claim this as your own. Your finished result is yours to do with as you please, including making tags and/or snags for others. You may offer your results wherever you wish, but you may not sell for profit. This tutorial was written by timber on April 24, 2009.
I wrote this tutorial using PSP8. To complete this tutorial you should have a comfortable working knowledge of the Tools, Materials and Layer palettes, as well as the Menu options and working with plugin filters.
For this tutorial, you will need:
Paint Shop Pro
Penta Jeans Filter (Garbage Collections)
Here are a few example frames to show you how this technique looks when using a solid color, a gradient, or a pattern as the fill for the frame (the second pattern example has been blurred before applying the Jeans filter).
 
  |
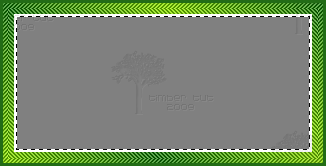
1. I'm going to assume that you will be adding this frame to an already existing image inside the borders of the canvas.
Add a new raster layer and name it "Frame".
Layers>New Raster Layer
Move this layer to the top of the Layer palette.
Layers>Arrange>Bring to Top |
2. Select all.
Selections>Select All |
 |
3. Load the Flood Fill Tool and fill the selection with your material (solid color, gradient, or pattern). For my example I will be using the Foreground-Background Gradient (Angle=45, Repeats=2, Invert unchecked, Style=Linear). My foreground color is a light green, and my background color is a dark green. Normally I would choose these two colors from a tube or other image on my canvas. |
4. Apply the Penta Jeans filter with these settings. These are the settings that I have used for all of my examples but you may adjust these settings as you like.
 |
5. Contract the selection by 5 pixels.
Selections>Modify>Contract |
6. Invert the selection.
Selections>Invert |
| 7. Fill the selection with the same material that you used in step #3. |
8. Mirror the selection
Image>Mirror |
| 9. Apply the same Jeans settings from step #4. |
| 10. Mirror the selection. |
11. Select none.
Selections>Select None |
12. Sharpen.
Adjust>Sharpness>Sharpen
Sharpen a second time. |
| 13. Select all. |
| 14. Contract the selection by 11 pixels. |
15. Delete the selection.
Edit>Clear
Note: If you only want the herringbone pattern as your frame, then you can stop here and deselect. Otherwise, keep the selection active and continue. |
| 16. Fill the selection with white (color=#FFFFFF). |
| 17. Contract the selection by 2 pixels. |
| 18. Delete the selection. |
19. On your Flood Fill Tool, reduce the opacity to 50. This allows the image below to show through a bit.

Fill the selection with black (color=#000000) or another very dark color of your choice.
 |
| 20. Contract the selection by 2 pixels. |
| 21. Delete the selection. |
| Create the Frame Shadow |
| 22. Add a new raster layer and name it "Shadow". |
| 23. Fill the selection with the same color and tool settings from step #19. |
24. Contract the selection by 2 pixels.
Note: If you're creating a frame on a small canvas like my example frames, then contract by 1 pixel (rather than 2). |
| 25. Delete the selection. |
| 26. Select none. |
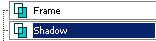 |
27. Move the Shadow layer down below the Frame layer.
Layers>Arrange>Move Down |
28. Apply a gaussian blur of radius=2 (or 3). Set the radius to whatever you think looks best.
Adjust>Blur>Gaussian Blur |
| Tag Examples |
I have used this frame technique on this tag below using the foreground-background gradient as explained in the tutorial.
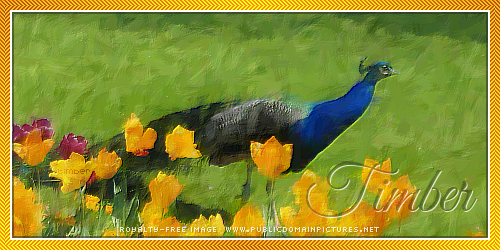 |
For this tag, I've used the background image as a pattern. Instead of using the Flood Fill tool to fill the selections in steps #3 and #7, I've copied the selection from the background image layer and then pasted it into the selection on the Frame layer.
 |
I can't wait to see what frames you create!
See member results HERE |
 Post Codes
 PSP Challenges
 Smileys