
You may print this out for your own personal use, but please do not rewrite, translate, e-mail out, offer any part of this on any other site, add to a CD, or claim this as your own. Your finished result is yours to do with as you please, including making tags and/or snags for others. You may offer your results wherever you wish, but you may not sell for profit. This tutorial was written by timber on October 25, 2007.
I wrote this tutorial using PSP8 and Animation Shop 3.10. Although I have included as many screenshots and details to make this tutorial easier for beginners, some basic knowledge of PSP and Animation Shop would be helpful. Unless I say otherwise, all 'clicks' are with the left mouse button. I have included keyboard shortcuts for the steps in parentheses ( ).
For this tutorial, you will need:
Paint Shop Pro
Animation Shop
Kingthings Pique'n'meex Font
Supplies:
Layered PSP File
Gold Pattern
Two-Color Glitter Drops Animation
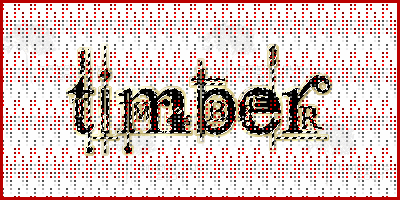
The two-color glitter drops animation that I used was created by combining two animated glitter tiles (Red and Silver Drops01) from Aardvark Animations (Wayback Machine link here). The layered PSP file has already been flood filled with the 8 frames of the animation on a 400x200 canvas. I will include the animation in the supplies in case you want to create something on a larger canvas.
My tutorial instructions will be for how to create this tag by using the layered PSP file.
|
1. Open PSP and Animation Shop (AS).
Open the font and minimize it to the taskbar.
In PSP, open the tbt-gold pattern and minimize.
Open the PGDTut-Layers file. |
2. Load the Text Tool  (T) and apply these settings* (all other settings on the toolbar should be default settings). (T) and apply these settings* (all other settings on the toolbar should be default settings).

*If you're using PSP 10/11/12, your text size is rendered differently than mine, so instead of using size 72, try size 96. |
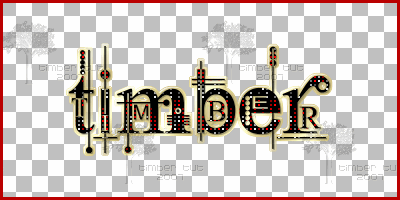
 |
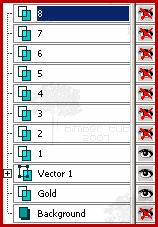
3. On the Materials palette, set the background color to black (#000000).
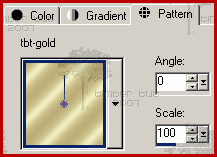
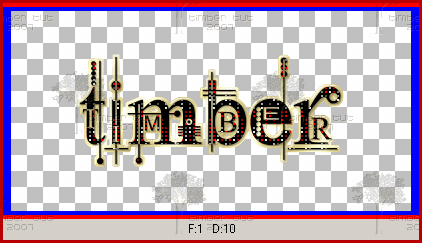
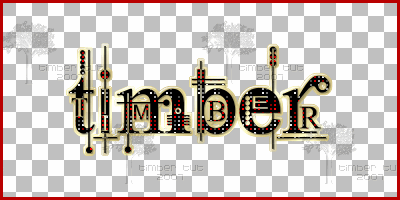
Now set the foreground material by clicking on the Foreground Material Box. Click the Pattern tab, load the tbt-gold pattern, and apply these settings. Click OK.
To load the pattern, click the Pattern Type drop-down list (▼) and select the tbt-gold pattern from the list of patterns (it should be towards the top of the list).
 |

 |
4. Click on the canvas, type your text into the Text Entry box, and click Apply.
Center the text on the canvas  . .
Objects > Align > Center on Canvas
This canvas size will accommodate most names (if you're making a siggy) in this font size, but if your name or text is wider than this canvas, decrease the font size until your text fits on the canvas. |
 |
5. Select the vector text  . .
Selections > From Vector Object (Ctrl+Shift+B)
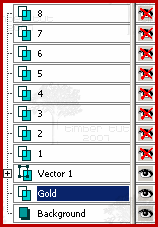
Make the Gold layer active.
 |
 |
6. Expand the selection  by 3 pixels. by 3 pixels.
Selections > Modify > Expand |
7. Load the Flood Fill Tool  (F) and apply these settings. (F) and apply these settings.
 |
 |
8. Flood the selection with the Foreground pattern. |
 |
9. Apply these Brightness and Contrast  settings. settings.
Adjust > Brightness and Contrast > Brightness/Contrast (Shift+B)

If you prefer a darker tone to your gold outline, then omit this step. |
 |
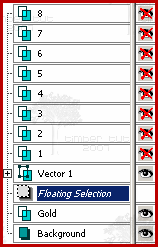
10. Contract the selection  by 1 pixel. by 1 pixel.
Selections > Modify > Contract
Float  the selection. the selection.
Selections > Float
 |
 |
11. Apply these Cutout  settings. settings.
Effects > 3D Effects > Cutout
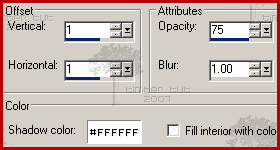
Defloat  . .
Selections > Defloat |
 |
12. Contract the selection  by 1 pixel. by 1 pixel.
Selections > Modify > Contract
Apply these Drop Shadow  settings. settings.
Effects > 3D Effects > Drop Shadow
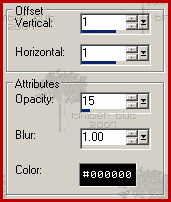 |
 |
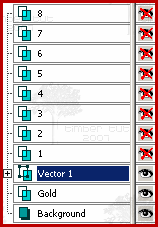
13. Make Vector 1 active.

Select the vector text  . .
Selections > From Vector Object (Ctrl+Shift+B) |
 |
14. Make Gold active.
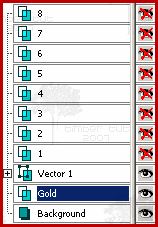 |

|
15. Apply these Drop Shadow  settings. settings.
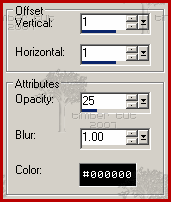 |
 |
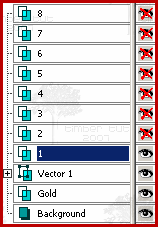
16. Make layer 1 active and unhide  it. it.
 |
 |
17. Invert the selection  . .
Selections > Invert (Ctrl+Shift+I)
Delete  the selection (by pressing the delete key or go through the menu). the selection (by pressing the delete key or go through the menu).
Edit > Clear (Delete) |
 |
18. Now make 2 active.
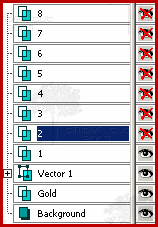
Delete  the selection. the selection.
It is not necessary to unhide the layer to delete the selection. Just make sure that you press the delete key while the layer is active. |
 |
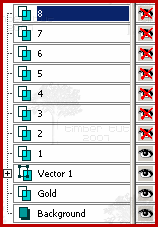
19. Now make 3 active and delete  . Continue moving up the Layer palette until the selections in all the numbered layers have been deleted. . Continue moving up the Layer palette until the selections in all the numbered layers have been deleted.
Deselect  . .
Selections > Select None (Ctrl+D)
 |
 |
20. Hide  the Background. the Background.
 |
21. Copy the merged layers  . .
Edit > Copy Merged (Ctrl+Shift+C)
In AS, paste as a new animation  . .
Edit > Paste > As New Animation (Ctrl+V)
 |
 |
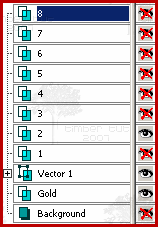
22. Back in PSP, hide  1 and unhide 1 and unhide  2. 2.
 |
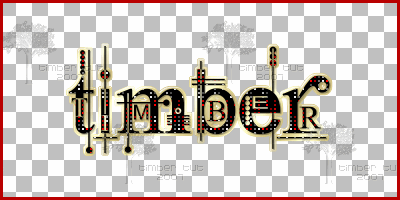
23. Copy the merged layers  . .
Edit > Copy Merged (Ctrl+Shift+C)
In AS, paste after the current frame  . .
Edit > Paste > After Current Frame (Shift+Ctrl+L)

(Screenshot not actual size) |
 |
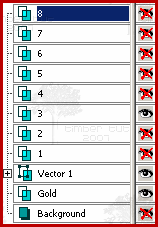
24. Back in PSP, hide  2 and unhide 2 and unhide  3. 3.
 |
25. Copy the merged layers  . .
In AS, paste after the current frame  . .

(Screenshot not actual size) |
26. Back in PSP, hide  3 and unhide 3 and unhide  4, and copy the merged layers 4, and copy the merged layers  . .
In AS, paste after the current frame  . .

(Screenshot not actual size) |
27. Now continue the process of hiding/unhiding (layers 4/5, 5/6, 6/7, 7/8), copying the merged layers, and pasting in AS after the current frame until you have 8 frames in AS.

(Screenshot not actual size) |
28. Crop your animation by double-clicking on the Crop icon on the Tool Palette.

Choose "Surround the opaque area" and click OK.

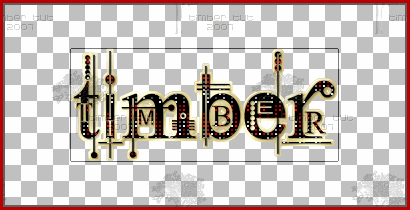
(Screenshot showing only Frame 1 of 8 frames) |
29. Double-click within the crop square to crop (or press the Crop button).

(Screenshot showing only Frame 1 of 8 frames) |
30. Save your animation  . .
File > Save (Ctrl+S)
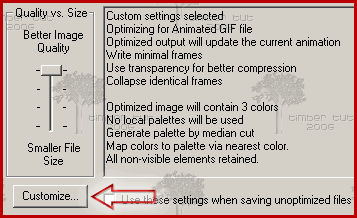
Click on the Customize button.
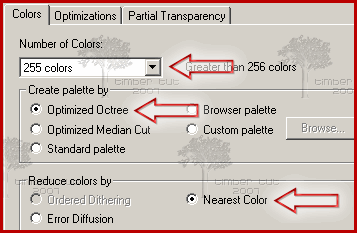
Click on the Colors tab and apply these settings.
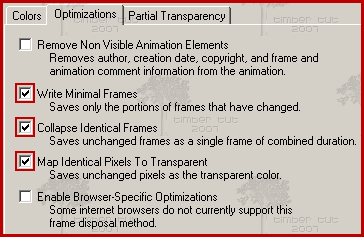
Click on the Optimizations tab and apply these settings.
Click on the Partial Transparency tab and apply these settings.
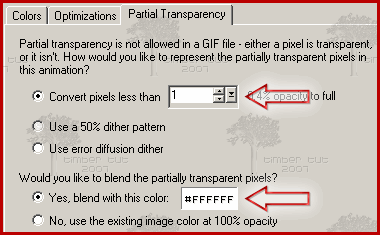
Click OK.
Click Next.
Click Next.
Click Next.
Click Finish.
YOU'RE DONE!!!

See member results HERE
|

